Getting started with Bytesafe is easily done in minutes:
- Create your workspace & admin user
- Use the npm client to publish and install packages from Bytesafe
- Invite your team members
- Discover and secure your dependencies
Create your workspace & admin user
First step of the sign up is to choose a workspace name (this will be part of the domain
name used to access Bytesafe, e.g. example.bytesafe.dev)
The next step is to create an admin user for your new Bytesafe workspace. You can sign up either with social logins (Google & GitHub currently supported) or using email & password.
After account creation has been completed you will be signed in to your new workspace and directed to Bytesafe.
From Bytesafe you can manage your account, invite your team members, setup registries, push and pull packages and more.
Using the npm client with Bytesafe
Bytesafe’s private registries are fully compatible with the npm client. Use npm as normal, no need to learn new commands or change your workflow.
New accounts includes an initial registry (named default) with the npmjs public registry pre-configured as an upstream.
Configure npm to use your new registry
The npm client stores its config in file .npmrc. To add credentials for your new Bytesafe registry, run npm login
$ # retrieve password from Bytesafe (available on registry page)
$ # use --registry flag to point to your bytesafe registry
$ npm --registry 'https://example.bytesafe.dev/r/default/' login
Username: bytesafe
Password:
Email(this IS public): example@example.com
$
If you want npm to use a Bytesafe registry as the default registry, you can set it with the npm config command:
$ npm config set registry 'https://example.bytesafe.dev/r/default/'
$
Publishing packages to a registry
You can publish packages to your new registry using the npm publish command.
$ # you can use the --registry flag to override the default registry
$ npm --registry https://example.bytesafe.dev/r/default/ publish 'some-package'
...
$
For more information on the npm publish command and its uses, please see official npm documentation for npm publish
Installing packages from a registry
The npm install command installs a package, and any packages that it depends on from a registry.
$ npm --registry https://example.bytesafe.dev/r/default/ install 'some-package'
...
$
If the specified Bytesafe registry does not contain the specific package, the package will be pulled from an upstream (if configured) and stored in the registry.
For more information on the npm install command and its uses, please see official npm documentation for npm install
Inviting your team members
Inviting others to access your Bytesafe workspace and registries is easy.
Team section of Bytesafe let’s you invite others by email. Recipients will receive an invite link that lets them create a user with access to the same registries as the inviter.
The team members page also keeps track of pending invites, has the option to resend invites as well as the option to disable user access to the workspace.
Discover and secure your dependencies
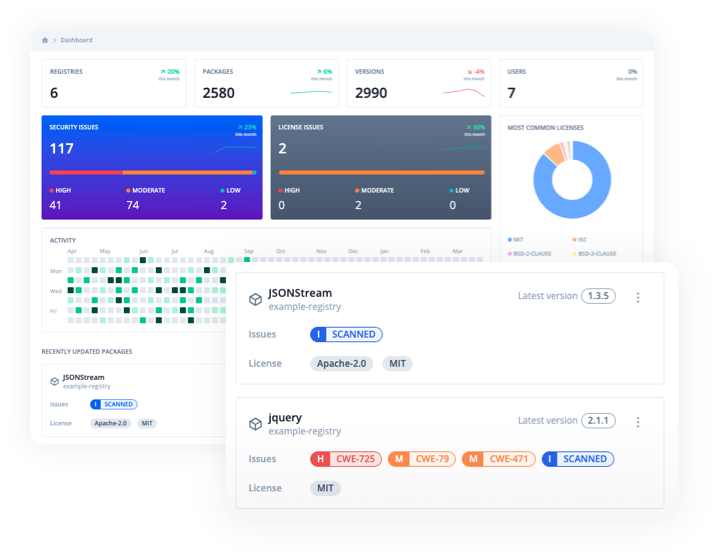
All packages added to Bytesafe are instantly available in the web application.
Add a projects dependencies to Bytesafe and identify what packages your apps depend on and their dependents. Gain insights, get notified of any issues and remediate them swiftly. Get both a holistic overview of relevant metrics with registry dashboards and explore detailed information about your packages in an intuitive user interface.
Bytesafe also secures your software supply chain. Continuously monitor dependencies for potential threats and license issues. Block undesirable packages and actions with our configurable policies.
Configuring registries
If the initial registry does not match your desired setup, you can configure your own registries, upstreams and plugins to fit your teams workflow.
To create a new registry, navigate to Registries and click the Create registry button. Enter a registry name and description and your new registry will be created.
You can rename, change the description or delete a registry, by navigating to the registry and selecting the Settings tab.
Configuring upstreams
Upstreams are linked registries, that can be either a public registry (registry.npmjs.org), other Bytesafe registries or a URL to an npm compatible registry.
Package versions can be pulled from an upstream down into a registry (either manually or when running npm install).
Packages can also be published (“pushed”) from a Bytesafe registry up to an upstream.
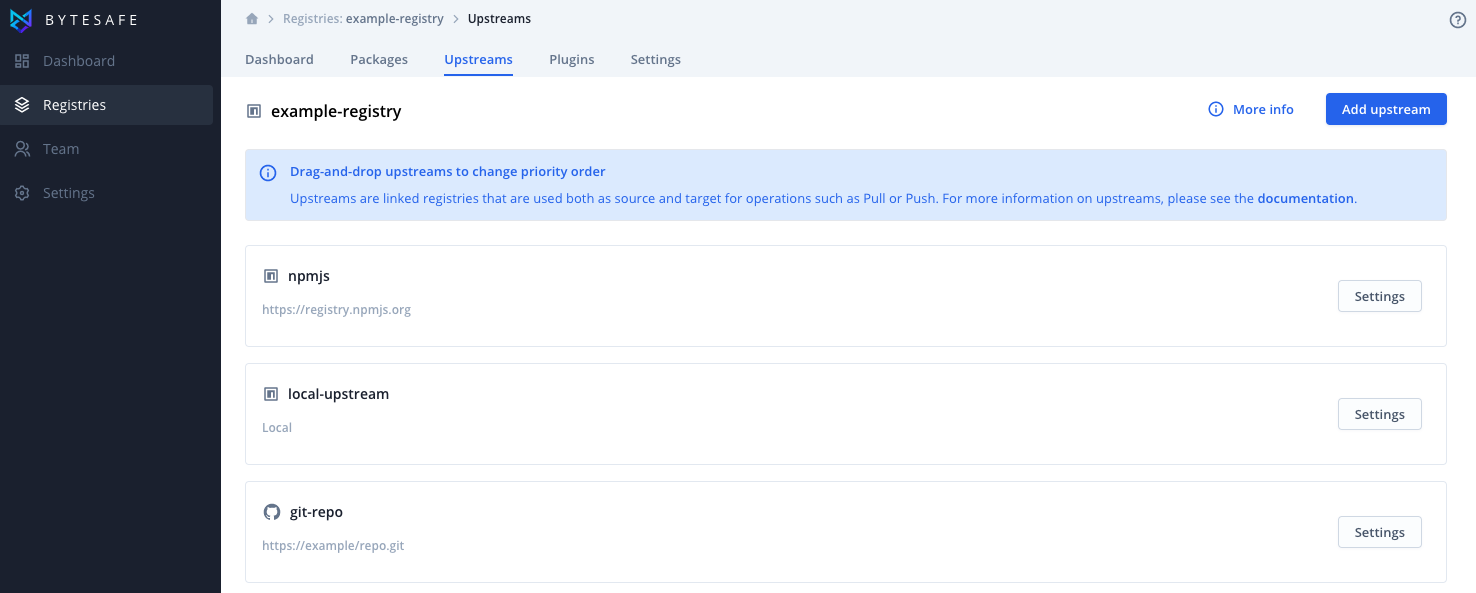
A registry can have multiple upstreams configured with a priority order in which they are searched.
To add and / or configure upstreams, navigate to the registry and click the Upstreams tab.
Configuring plugins
Plugins extend on Bytesafe’s core with added functionality and perform actions for you. Policies are rules that are executed before any registry action is applied.
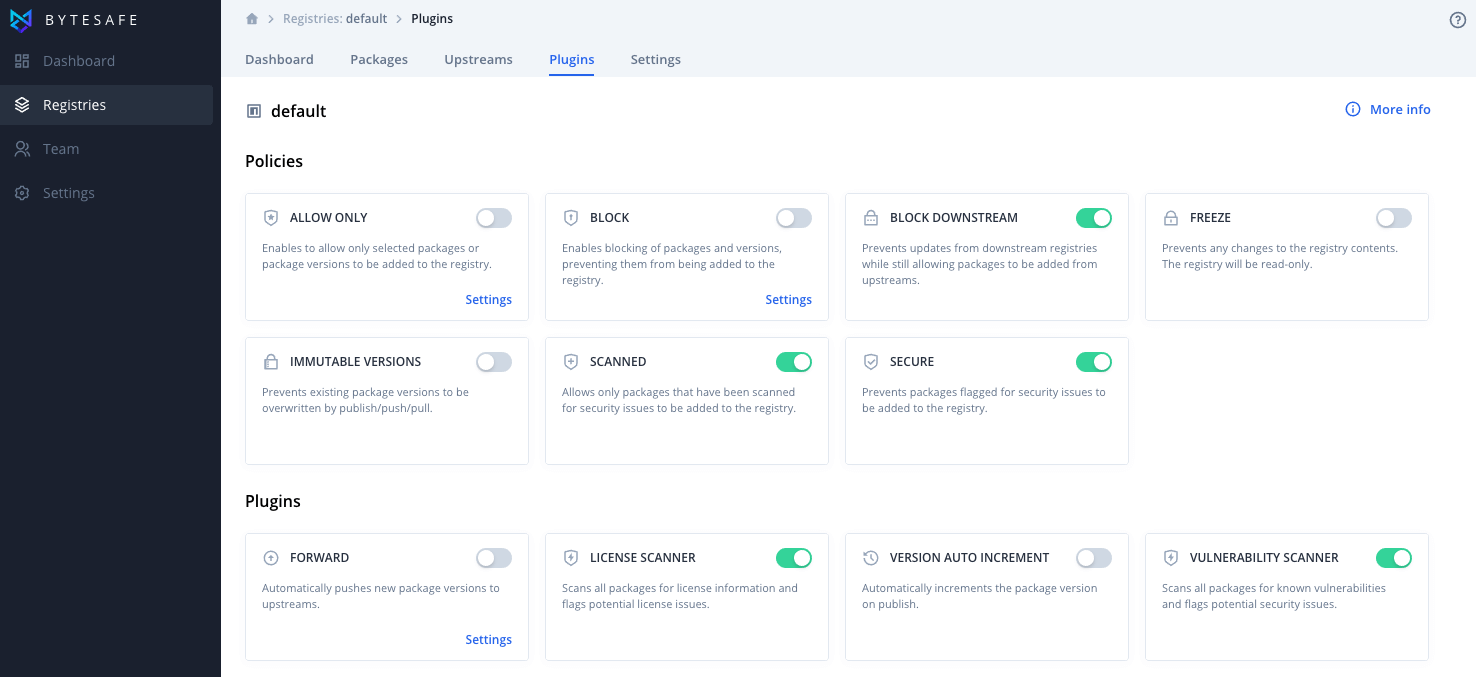
Configure policies and plugins according to your business rules. Take your npm package workflow and security to the next level!
We would love to hear from you!
Unanswered questions on how to use Bytesafe? Want to know more about how Bytesafe can help your organizations? Have suggestions for Bytesafe’s roadmap?
Contact us here and we will get back to you!